Clerk 2K™ - Getting Started

"This was no time for play.
This was no time for fun.
This was no time for games.
There was work to be done."
- Dr. Seuss

If you have ever entry clerked a show, you may well feel this way. Hopefully, using Clerk 2K™ will help reduce the amount of work and bring a little more of that 'fun' back to entry clerking.

This section gives you the information that you will need to get started with Clerk 2K™. If you do nothing else, it is strongly recomended that you read this section and the next section (Overview) before trying to use Clerk 2K™. There are many time saving features built into Clerk 2K™, but they will only help you if you know about them and how to use them.

Introduction

Clerk 2K™ is a windows based entry clerk program for CFA shows. Please see the section on reports for more details.

It is assumed that the user of this progarm is familar with the basic operation of the Windows operating system (such as pointing to an object with the mouse, clicking/double clicking a field, making a menu selection, dragging an item with the mouse, making a text selection, etc.). If you are not, you will need to learn these before using this software.

System Requirements

Clerk 2K™ has very few requirements. The first, is that you must be running the Windows operating system. With the exception of needing about 3 Mb of hard disk space (this may be higher if you process multiple shows - the installation program requires that you have at least 10 Mb available), Clerk 2K™ should run just fine if your version of Windows is able to run other user applications. It is recommended that your display resolution be SVGA (800 x 600) or better, but Clerk 2K™ will work on a VGA (640 x 480) monitor. A floppy disk drive is required to create data disks REQUIRED by CFA begining May, 2000.

Installing Clerk 2K™

Clerk 2K™ does not require any special installation. The only files involved are the executable itself (Clerk2K.exe) and the main data file (clerk.cdm). Some installations will also include a sample show file and/or an initial file for a particular show.

For Windows 95/98/NT/2000/ME/XP:   Clerk 2K™ comes on a self loading CD-ROM. Simply insert it in your CD-ROM drive and wait for it to start the installation. If the installation does not start automatically, you can manually run it from the Start Menu. From the Start Menu, select 'Run...' and type 'x:install' (where x is the drive letter for the CD-ROM (or floppy). Follow the instructions. The installation program will create a program group named 'Clerk 2K™'. It will also bring up a window for that program group that will contain a shortcut to the Clerk 2K™ program installed. If you like, you can drag a copy of that shortcut to the desktop.

For Windows 3.x:   A 16 bit version of Clerk 2K™ is available (only on floppies). If you are running Windows 3.x and would like a 16 bit version, please contact us for details. Some features that are available in the 32 bit version are not available in the 16 bit version, but they are very minor in nature. Follow the installation instructions above.

After installing the program, you will need to create a data file for the show and enter the information about that show (such as the show date, entry fees, number of rings, show format, confirmation messages, etc.). This is covered in the next two subsections.

Creating a Show File

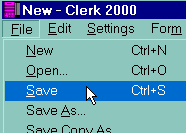
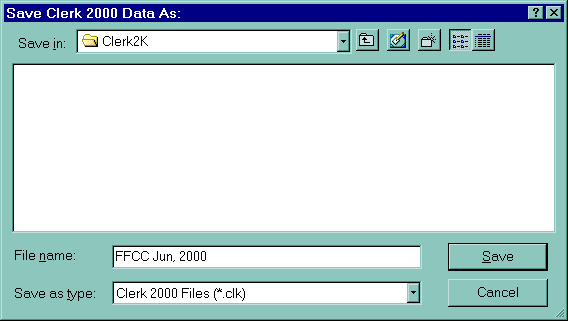
File - Save When you start Clerk 2K™ for the first time, it will come up with a new (default) data file labled 'New' (by default, all Clerk 2K™ files have the extension '.clk', but this is not required). Before doing anything else, you should create a file that you will use for the show. To do this, select Save under the File menu (Save As will work as well).

This will bring up a Save As file dialog (since this is a new file that has not been saved before, it is assumed that you most likely want to save it under a different name than New.clk). Let's say that you are processing a show for the Fancy Feet Cat Club to be held in June, 2000. You might use the file name 'FFCC Jun, 2000'

Save As Dialog

Title Bar You will notice, that after doing this the title bar of the main window changes to reflect the new file name that you saved the data under. The title bar always shows the name of the current data file being used by Clerk 2K™.

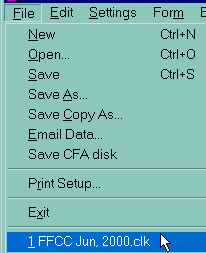
File menu When you exit the program, this file is remembered and opened again the next time you start Clerk 2K™. So once you set up a data file for a show, you don't have to keep selecting it each time you run Clerk 2K™ (assuming you are only processing one show at a time). You will also notice that the file name is added to a file list at the end of the File menu.

Clerk 2K™ maintains a list of the 4 most recently processed files. If you are processing more than one show at a time, you can use this list to quickly select the data file to process (instead of selecting a data file using the Open command).

You can create a new show data file at any time by selecting the New command in the File menu and then following the instruction in this section and the next on setting up show data.

Setting Up Show Data

Show Info menu Almost all of the information needed to process a specific show is entered using the Show Setup dialog which is selected from the Show Info command in the Settings menu.
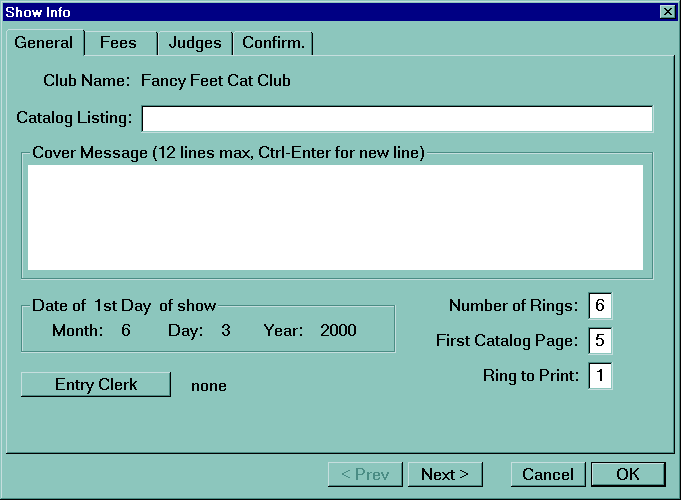
The Show Info dialog is a tabbed dialog containing 4 different sections. You select the section you want to change (or look at the setting for) by clicking the appropriate tab at the top of the dialog (which are labled General, Fees, Judges, and Confirm.). You can also use the '< Prev' and 'Next >' buttons at the bottom of the dialog to select different sections. The dialog always starts in the General section.

Described below is a brief description of each field of the General section:

Show Info Dialog - General

NOTE: The show setup information presented in this example already has the club name and show date filled in. This will be the case if you have a "Single Use" copy of Clerk 2K™. These fields cannot be changed. If you have "Multiple Use" version, you will be able to change the show date, but the club name will remain fixed. The "Professional Use" version allows you to change both the club name and show date, but the entry clerk name cannot be changed.

Club Name: Fill this in with the club name. If you have a "Single Use" copy of Clerk 2K™, this field cannot be changed. It is preset to the club's name.

Catalog Listing: This is the line that will be printed on the bottom of each page of the catalog. Usually it will contain the club's name and show date. Something of the form:

Fancy Feet Cat Club's 7th Show    June 3 & 4, 2000

The text is limited in length to about 60 characters so that it will fit within the left and right margins for the page along with the page number which is inserted by Clerk 2K™.

Cover Message: This field allows you to provide upto a 12 line message that will either be printed on the top of the cover sheet for a confirmation (on the back side of the folded cover sheet, the address gets printed on the front). This message is also printed at the top of the confirmation if the 'Cover Sheet' option is not selected. There is no fomatting done with this text, so it needs to be 'spaced' over manually for any desired formatting. See confirmations in the next section for more details.

Date of 1st Day of show: Enter the month, day and year of the first day of the show in this field. This field is fixed to the actual show date for a 'Single Use' version and cannot be changed.

Number of Rings: Enter the number of rings for the show in this field. If there are seperate rings for two single specialty judges, those should be counted as one ring.

First Catalog Page: Enter the page number for the first page of the show catalog printed by Clerk 2000. The default is 5 since there is usually some cover sheets and advertising at the beginning of the catalog.

Ring to Print: This field is set to the ring number to be printed when printing judge's books. It should be changed for each set of judge's books printed. It is planned to move this field to another dialog in future versions, but for now, it needs to be changed here.

Ring to Print: This field is set to the ring number to be printed when printing judge's books. It should be changed for each set of judge's books printed. It is planned to move this field to another dialog in future versions, but for now, it needs to be changed here.

Entry Clerk: Click on this button to select the entry clerk for the show (this field is fixed for the 'Professional Use' version). This will bring up a dialog of existing people from which you can select (by double clicking on the name) the entry clerk for the show (if the entry clerk is already in the Clerk 2K™ Master Data file). If the entry clerk is not in the Master Data file, click on the 'DONE' button in the name selection dialog and you will be presented with another name selection dialog for people who are part of the show being processed. You can then select the entry clerk from this list, or create a new entry for the entry clerk and double click it to select that person. Make sure to include an email address if the entry clerk will be processing email confirmations. See the People and Names section for more details about selecting/entering a person.

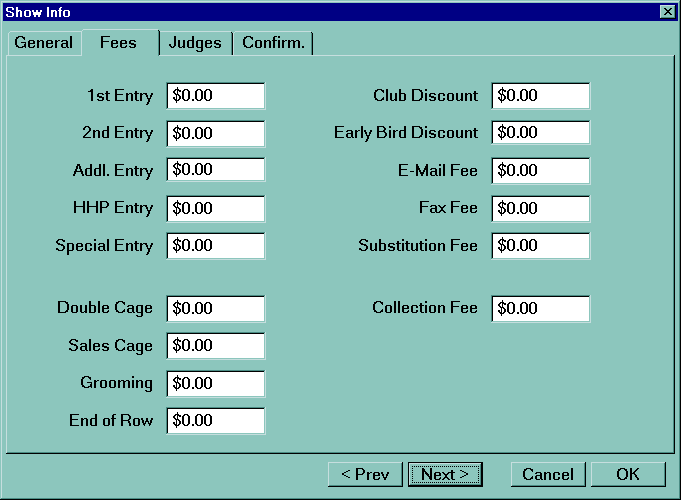
Described below is a brief description of each field of the Fees section:

Show Info Dialog - Fees

1st Entry: Enter the amount of a first entry. This amount is used when 1st Entry is selected when entering a cat.

2nd Entry: Enter the amount of a second entry. This amount is used when 2nd Entry is selected when entering a cat.

Addl. Entry: Enter the amount of an additional entry. This amount is used when Addl. Entry is selected when entering a cat.

HHP Entry: Enter the amount of an Household Pet entry. This amount is used when HHP Entry is selected when entering a cat.

Special Entry: Enter the amount of a Special entry. This amount is used when Special Entry is selected when entering a cat.

Double Cage: Enter the amount of a Double Cage. This amount is used when Double Cage is selected when entering a cat.

Sales Cage: Enter the amount of a Sales Cage. This amount is used when Sales Cage is selected when entering a cat.

Grooming: Enter the amount of a Grooming space. This amount is used when Grooming Space is selected when entering a cat.

End of Row: Enter the amount of an End of Row. This amount is used when End of Row is selected when entering a cat.

Club Discount: Enter the amount to be used for a Club Discount. This amount is used when Club is selected when entering a cat. For example, if a club gives a free double cage to club members, enter the price of a double cage in this field and select Club whenever a club member requests a double cage. The two offset each other and the result is that the club member gets the free double cage.

Early Bird Discount: Enter the amount of an Early Bird Discount. This amount is used when Early is selected when entering a cat. If there is a fixed discount for early bird entries, enter that amount in this field and select the Early option when processing Early Bird entries. If there is not a fixed discount for all Early Bird entries, you could enter the discount for the first entry and use the Early option when processing 1st entries. All other entries would have to be manually discounted.

Email Fee: Enter the Email Fee amount in this field. This amount is used when Emailed is selected when entering a cat. If there is a fixed fee for all emailed entries, enter that amount in this field and select Emailed only when processing the first entry for an exhibitor.

Fax Fee: Enter the Fax Fee amount in this field. This amount is used when FAXed is selected when entering a cat. If there is a fixed fee for all FAXed entries, enter that amount in this field and select FAXed only when processing the first entry for an exhibitor.

Substitution Fee: Enter the Substitution Fee amount in this field. This amount is used when Subst. is selected when substituting a cat.

Collection Fee: Enter the Collection Fee amount in this field. This is the fee that the club charges for processing a bad check or collecting FAX/Emailed entry fees not paid before the show.

Described below is a brief description of the fields in the Judges section:

Show Info Dialog - Judges

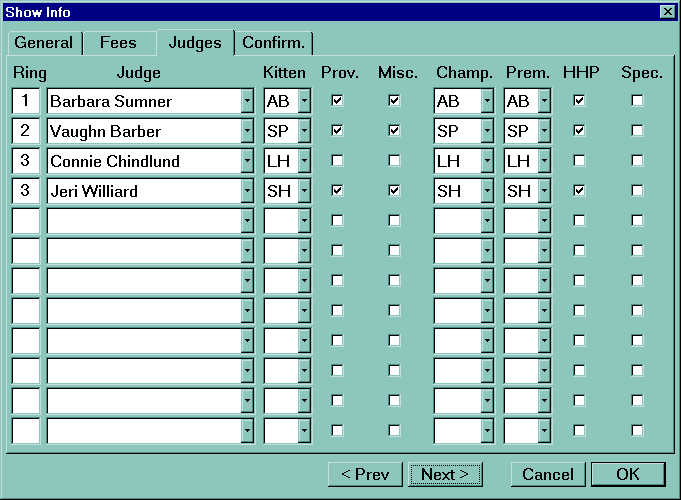
This section allows you to provide information about the judges for the show. This information is used for printing the catalog and as such, may not entirely agree with the actual physical judging rings for a show. To provide this judging information, you fill in the fields with the information described above each column. For each row (ring):

Ring is the ring number (as printed left to right in the catalog) for the information being provided for the rest of that row (ring information).

Judge is the judge performing the duties specified in the remaining columns for that ring.

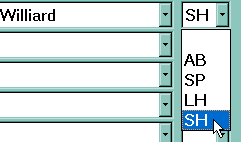
Ring Type Kitten, Champ. and Prem. are pick lists that can be used to select if those classes are being judged as Allbreed, Specialty, Longhair or Shorthair. If the judge is not judging that class at all, select the blank item.
Prov., Misc. and HHP are check boxes. Check them if those classes are being judged.

Spec. is a check box for a special ring such as a breed specialty ring.

Again, this information is used for generating the catalog and specificly the heading printed across the top of each page. As such, it is not possible to specify two (or more) judges performing the same function (specified by the check boxes) in the same ring even though at the show this may be done if they are judging on seperate days. In the above example, B. Sumner, V. Barber and J. Williard are all specified as judging HHP. If you wanted C. Chindlund to judge HHP instead of B. Sumner you could specify the following:

Show Info Dialog - Judges

By adding the extra entry for C. Chindlund, you can specify that her initials will be placed above ring 1 in the HHP section of the catalog even though she will physically be in ring 3.

NOTE: The list of judges and the classes they are judging is sorted by ring number when the dialog is brought up again after you first enter the information. So don't be alarmed if they are not in the same order as you originally entered them.

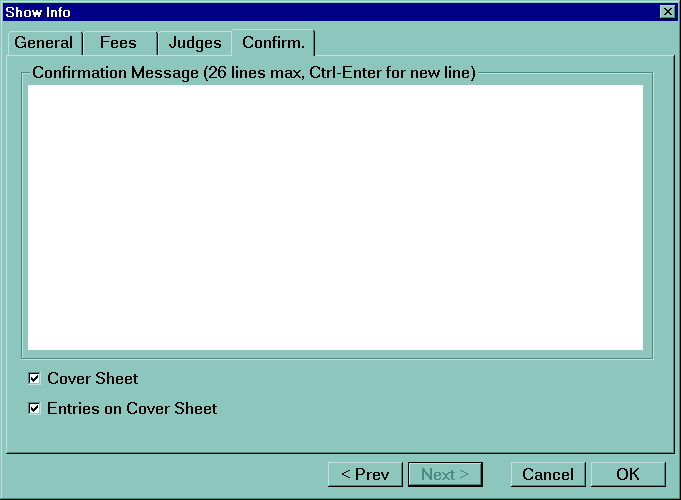
Described below is a brief description of the fields in the Confirm. section:

Show Info Dialog - Confirmation

Confirmation Message: This field allows you to provide upto a 26 line message that will be printed at the end of the confirmation. There is no fomatting done with this text, so it needs to be 'spaced' over manually for any desired formatting. See confirmations in the next section for more details.

Cover Sheet: If this field is selected (checked), then a cover sheet is generated when a confirmation is printed for an exhibitor. The owner(s) of the first entry that was CONFIRMed is used for the address when creating the cover sheet. Because of this, you may want to process an entry who's owner is:
Clinton Parker
before processing an entry with an owner:
C-D Parker/J-E Thompson

Entries on Cover Sheet: If this field is selected (checked), then entries are printed on the cover sheet (if there is one) after the address. This option is very useful for processing entries using a single legal sheet of paper. For this type of confirmation, the show flyer and directions are pre-printed on one side of the legal paper. The Cover Message and addresses are then printed on the top half of the reverse side, followed by upto 4 entries on the bottom half of the reverse side. Fold the resulting confirmation in quarters, tape and stamp it - you're done - drop it in the mail box.

contents     contents     overview

last modified November 9, 2001
© 1999-2001  Clinton Parker.  All Rights Reserved.